Photoshop Quick Tip: Create a Lomo Effect in 3 Simple Steps
Unless you've been under a rock for the past 10 years then you're probably familiar with the look of Lomography or "Lomo" style photos. These photos typically feature unique coloring, high contrast, soft focus and dark vignettes. The movement was started in the early nineties when the founders were inspired by the images produced from cheap Russian toy cameras like the Lomo LC-A.
The good news is, you don't have to have one of these cameras to produce your own "Lomo styled" photos. With 3 simple steps in Photoshop you can create some very interesting Lomo looks.
First up, you need a good photo. Actually it doesn't necessarily have to be good, just a photo that you like. I found this one, which I think we'll work well for this tutorial.

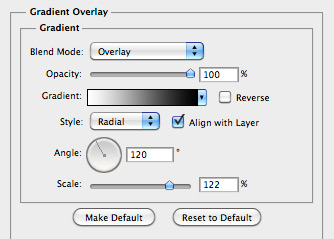
 Now we need to add a gradient overlay layer style to the adjustment layer using the following settings.
 You should now have a nice vignette with a brighter center.


 Now create new layer mask for the blurred layer. And use a large soft black brush paint in the center to reveal some of the focused layer beneath.
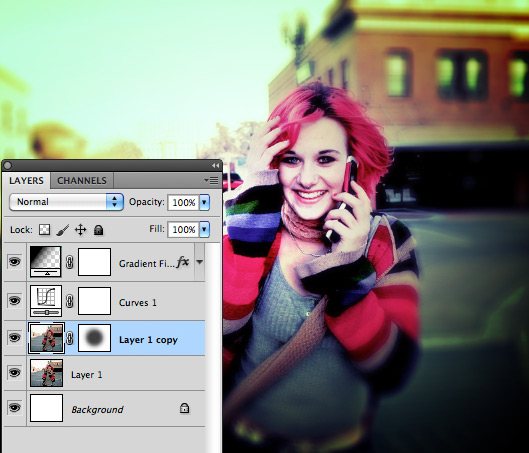 That's it... These simple techniques can create some interesting and fun "Lomo" type effects. Try them on your photos and experiment to see what you can create.


Step 1 - Create a Strong Vignette
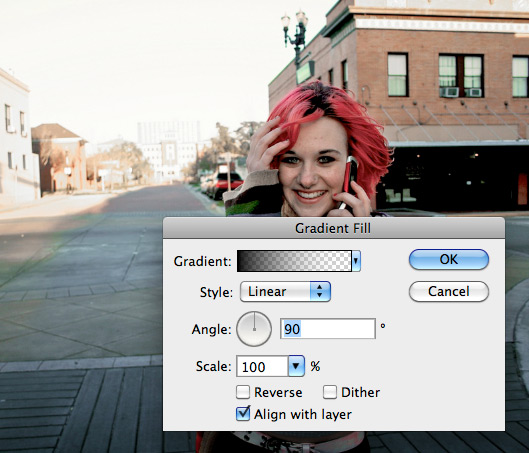
To create our vignette effect we're going to add a gradient fill adjustment layer. We'll need to set this adjustment layers blending mode to soft light. Now we need to add a gradient overlay layer style to the adjustment layer using the following settings.
 You should now have a nice vignette with a brighter center.

Step 2 - Add a Little Cross Processing
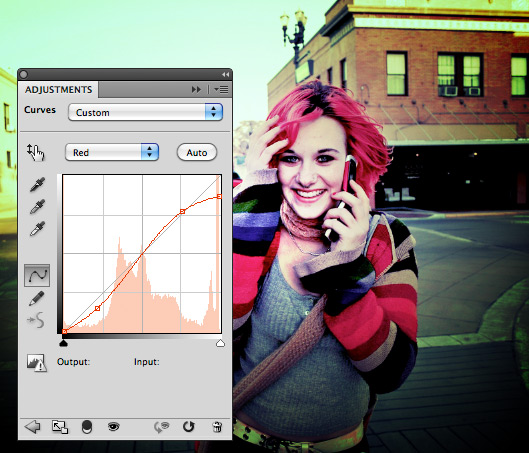
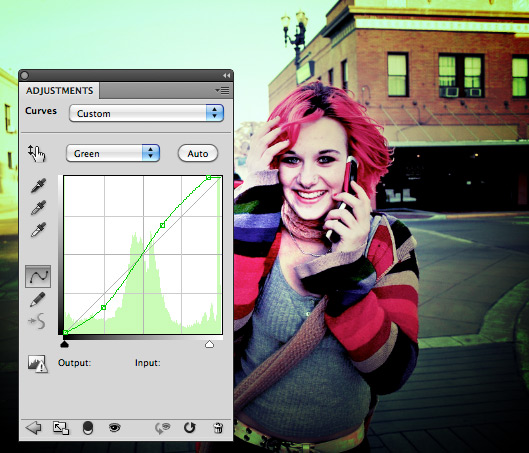
Cross processing a photo means that it is color film developed in a different chemical than what is intended for that particular film. For example, color 35mm film developed in chemicals intended for slide film. The result is unusual coloring. For our purposes, we're going to use a cross processing technique in Photoshop to produce the often bright and interesting colors of Lomography. Lets create a new curves adjustment layer. There are no rules for these curve settings. The trick is that we want to adjust the RGB channels separately. I've included my settings below, but you may choose something different, especially if you are using a different photo.


Step 3 - Blur the Edges
Next we want to blur everything in the photo except for our focal point. To do this, copy the original photo layer, then choose (Filter | Blur | Lens Blur). Don't worry about specific settings, just create enough blur with the filter. We'll be removing some of it with a mask. Now create new layer mask for the blurred layer. And use a large soft black brush paint in the center to reveal some of the focused layer beneath.
 That's it... These simple techniques can create some interesting and fun "Lomo" type effects. Try them on your photos and experiment to see what you can create.


