How to Create a Photorealistic Troll Using Photoshop
Sometimes, just opening Photoshop and playing around for a few minutes, can be the most fun. When you have no purpose, or deadline to contend with, just pure experimentation on the brain, you can create some interesting effects. Below is a tutorial, that I created doing just that. How to create a photorealistic troll in just a few minutes. Lets take a look.
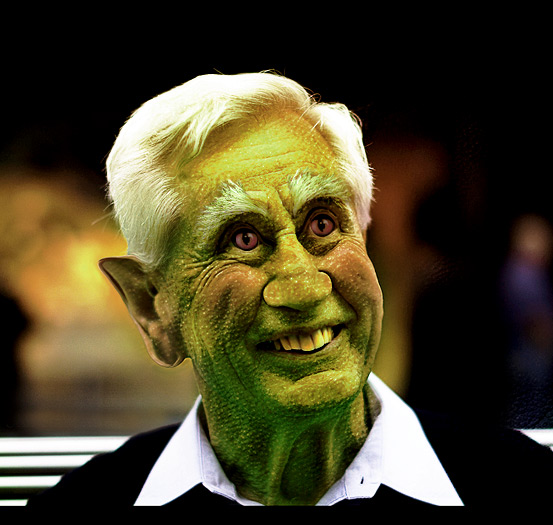
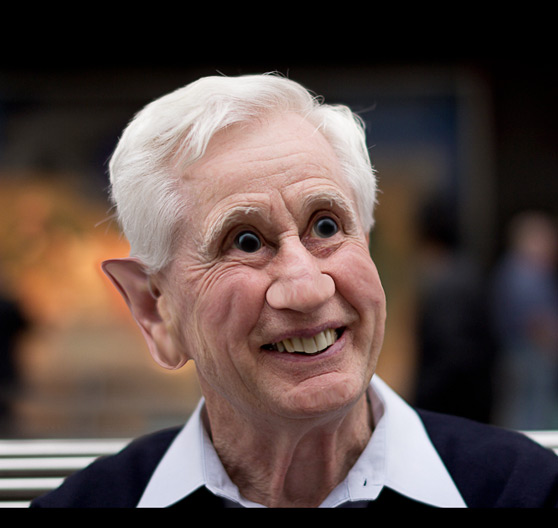
Here's a look at what we'll be creating. I wanted to use a real photo as the basis to create a sort of "Trolls are among us" type feel.
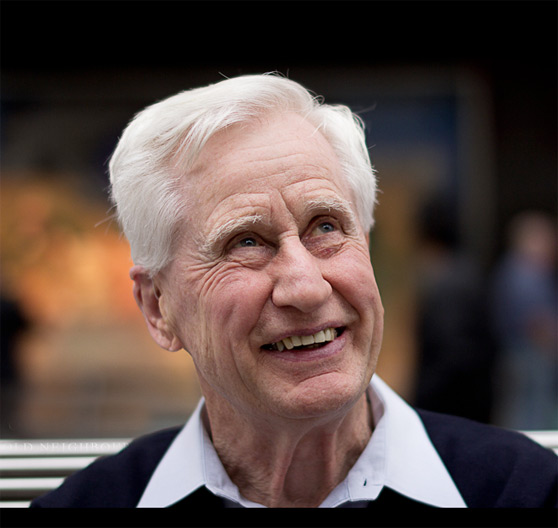
 First up we need a good photo to experiment on. After some searching I found this excellent photo of a man, taken by Colin Logan. I chose this photo because I thought the man's face had a lot of character, and it would be excellent for my little experiment.
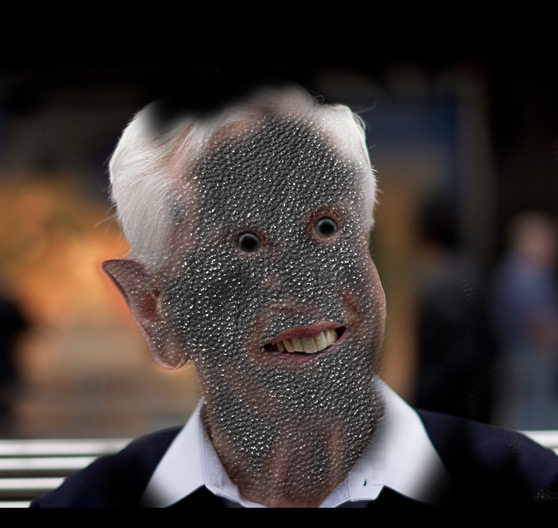 I then set the texture layer's blending mode to Overlay.
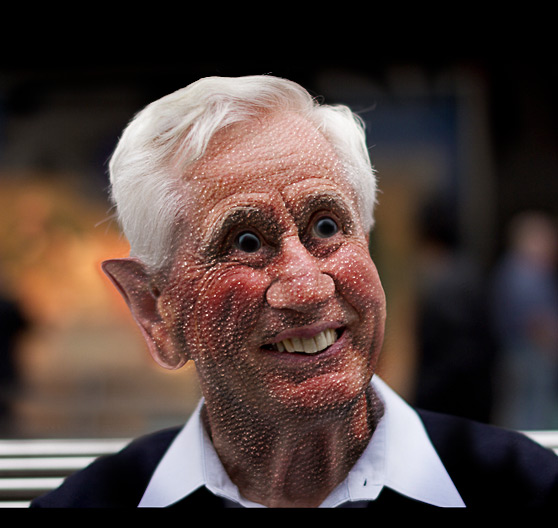
 I removed portions of the green by drawing on the adjustment layer's mask.
 What's a troll without yellow teeth? On a new layer set to Overlay, I colored his teeth using a medium tone yellow.
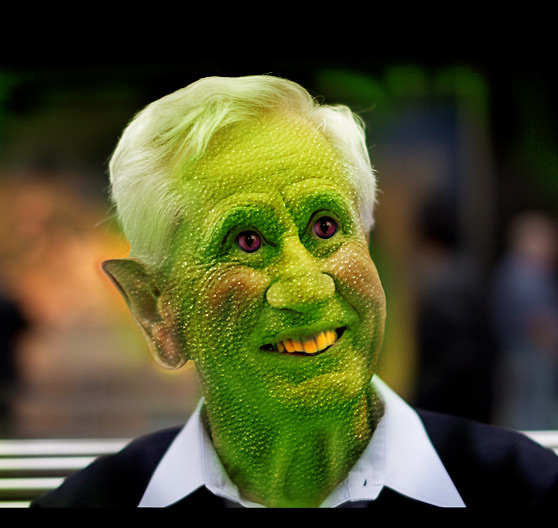 I also felt like he needed some bushy eye brows, so I went back to the cat photo and made a selection of the cat's fur above it's eye.
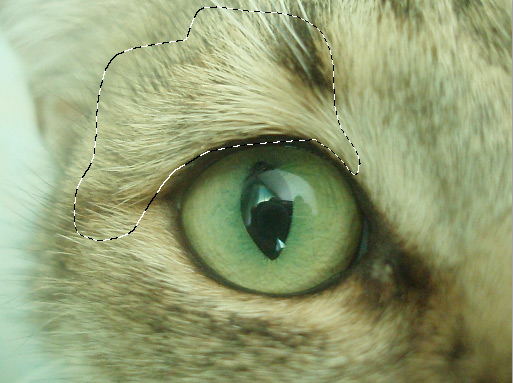 I then copied and pasted it over the eye of the troll, then duplicated it, flipped it horizontally and used the warp tool to bend it to shape. I placed the eyebrow layer above the green tone adjustment layer. I used the Hue/Saturation tool to give them a green tone.

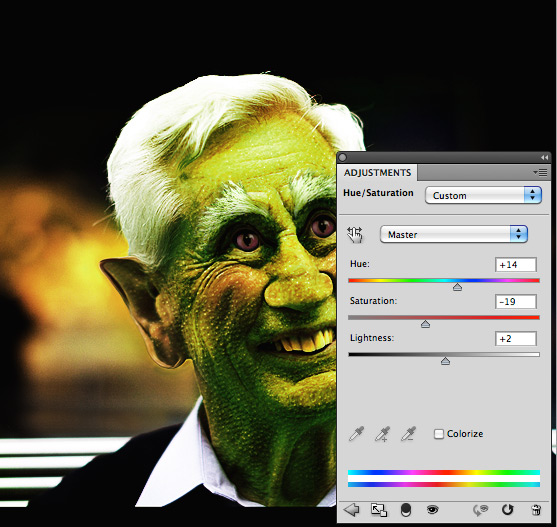
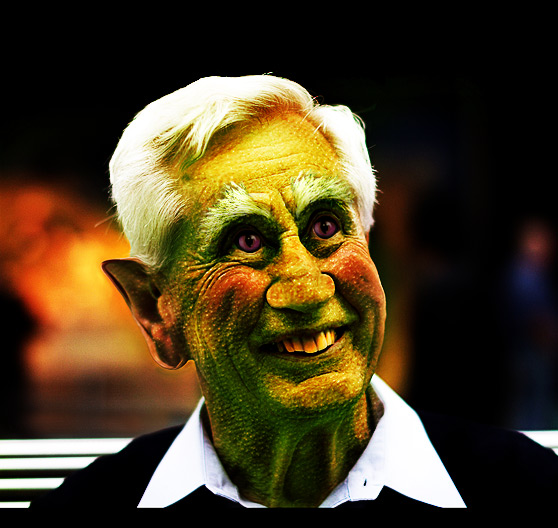 Better, but a little to saturated. Above all layers, I added a Hue Saturation adjustment layer.
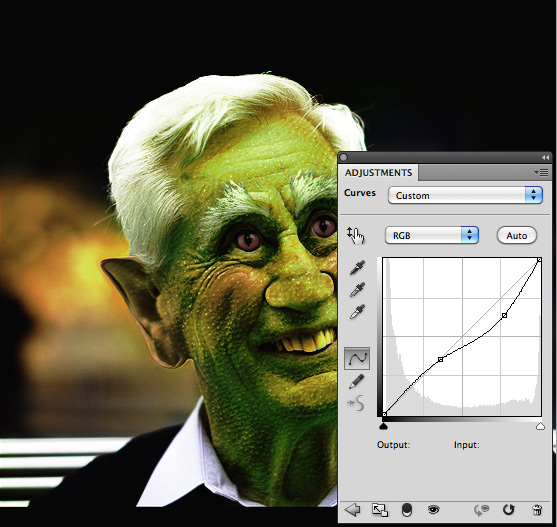
 Then a curves layer to remove a bit of the highlight contrast.
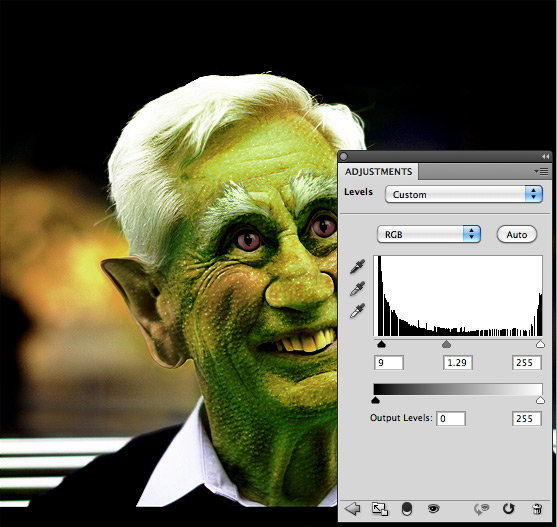
 Finally, a Levels adjustment layer to bump the brightness a touch.
 For the last adjustment, I created a new layer below these adjustment layers, and used a large soft red/orange colored brush to create a highlight of color. Set this layer's blend mode to Soft Light.
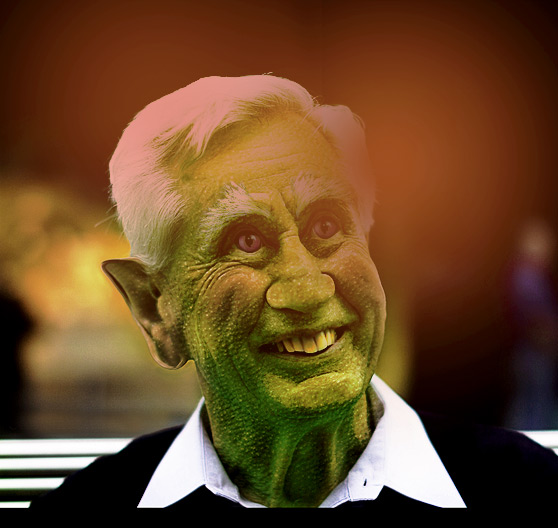 There you have it... A friendly looking troll sitting on a park bench, on a beautiful day. I hope these techniques inspire some experimentation on your part. I'd love to see your troll photos, so feel free to link to them in the comments below!

 First up we need a good photo to experiment on. After some searching I found this excellent photo of a man, taken by Colin Logan. I chose this photo because I thought the man's face had a lot of character, and it would be excellent for my little experiment.

Step 1 - Liquify
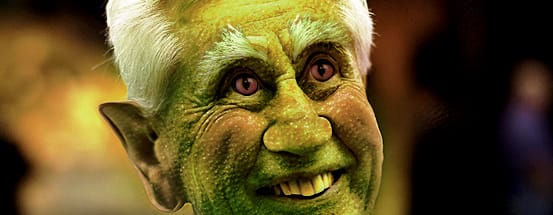
This tutorial depends greatly on the success of this step, so take your time until you you achieve the effect you're after. Open the Liquify Filter (Filter | Liquify). I used the Bloat Tool (B) on the eyes, nose, cheeks, and chin. Then I used the Forward Warp Tool (W), to shape the ears and face. As I mentioned before experiment with this tool. You can achieve some incredibly cool results. Below is my finished liquify effect.
Step 2 - Adding Texture
For the texture of his skin I chose a leather texture from this set here at WeGraphics. But any good leather texture will work, if you're not a WG member. I placed the texture on a layer above the man, desaturated it, and used a layer mask to remove portions of it so that it only appears over his face. I then set the texture layer's blending mode to Overlay.

Step 3 - Adding Color
In this step, I want to add a green hue to his skin, but I want some of the original skin tone to show through, since skin is never really one solid tone. To accomplish this I created a solid color adjustment layer using a medium green tone (#6a8811). I changed the blend mode for this adjustment layer to soft light. I removed portions of the green by drawing on the adjustment layer's mask.
Step 4 - Adding Detail
I wanted to replace the eyes, and give him more of an other-worldly look. To do this I found a great image of a cat's eye taken by Marcus Vegas. I copied and pasted the eye and sized it down to fit over the man/troll's eyes. I also, adjusted the Hue/Saturation to color them purple. What's a troll without yellow teeth? On a new layer set to Overlay, I colored his teeth using a medium tone yellow.
 I also felt like he needed some bushy eye brows, so I went back to the cat photo and made a selection of the cat's fur above it's eye.
 I then copied and pasted it over the eye of the troll, then duplicated it, flipped it horizontally and used the warp tool to bend it to shape. I placed the eyebrow layer above the green tone adjustment layer. I used the Hue/Saturation tool to give them a green tone.

Step 5- Final Color Adjustment
At this point, I was getting close, but felt that some major color adjustment and sharpness was needed. First up, I duplicated the troll layer a couple of times and set those layer's blending modes to Overlay. Better, but a little to saturated. Above all layers, I added a Hue Saturation adjustment layer.
 Then a curves layer to remove a bit of the highlight contrast.
 Finally, a Levels adjustment layer to bump the brightness a touch.
 For the last adjustment, I created a new layer below these adjustment layers, and used a large soft red/orange colored brush to create a highlight of color. Set this layer's blend mode to Soft Light.
 There you have it... A friendly looking troll sitting on a park bench, on a beautiful day. I hope these techniques inspire some experimentation on your part. I'd love to see your troll photos, so feel free to link to them in the comments below!
