Converting a clean magazine-style PSD template to HTML/CSS
 Test the live preview in your browser to see how the template will look after the HTML conversion.
DOWNLOAD PSD + HTML/CSS TEMPLATE
Understanding the general structure
The first step is the key to create a robust and optimized layout. Before starting with the code we need to understand the basic structure of our layout. I'm not a great fan of schematic procedures, a creative process, in building a good web design, can surely start in Photoshop, without a wireframe. At any rate I'm sure that a logical scheme of the layout is really important also when the design borns directly in Photoshop without a sketch, especially when we have to code. For this reason I've noted the important elements on a sheet. It's evident that we are working on a centered layout with a fixed width, for this reason we have to wrap it in a #main_container and then centre that container.
The #header is out of the #main_container because its background will cover the entire width of the browser window. Within the #main_container there are: the #content (where we can place the featured articles and the lists with articles by categories), the #sidebar with the navigation menu and some useful "widgets" (popular posts, galleries and social media icons), finally, the #footer.
It's evident that we are working on a centered layout with a fixed width, for this reason we have to wrap it in a #main_container and then centre that container.
The #header is out of the #main_container because its background will cover the entire width of the browser window. Within the #main_container there are: the #content (where we can place the featured articles and the lists with articles by categories), the #sidebar with the navigation menu and some useful "widgets" (popular posts, galleries and social media icons), finally, the #footer.
From PSD to HTML/CSS - The HTML code
We can start to code keeping in mind the general structure just seen.Step 0
Create a new directory /htm_css_template; there you can put in the necessary files, index.html and style.css, and the directories for the images (/images and /images/photos). You can insert into the directory images/photos all the thumbnails and the images for the articles.
Step 1 - DOCTYPE, head and general HTML structure
We are ready to start. Open index.html into your favourite text editor (I usually work with Notepad++); define the DOCTYPE, we use XHTML 1.0 Strict that "contains all HTML elements and attributes, but does NOT INCLUDE presentational or deprecated elements (like font);" define the head of your document (that's a container for all the head elements such as scripts meta information, and more) and then add the divs to build the basic structure.<!DOCTYPE html PUBLIC "-//W3C//DTD XHTML 1.1//EN" "http://www.w3.org/TR/xhtml11/DTD/xhtml11.dtd"> <html xmlns="http://www.w3.org/1999/xhtml"> <head> <meta http-equiv="content-type" content="text/html; charset=UTF-8" /> <title>FOOTY - Football community redefinited</title> <link rel="stylesheet" href="style.css" media="screen" /><!--your CSS file for styling the layout--> </head> <body> <div id="header"> </div> <div id="main_container"> <div id="content"> <div class="featured_articles"> </div> <div class="other_articles"> </div> </div> <div id="sidebar"> <div class="categories_navi"> </div> <div class="social_icons"> </div> <div class="side_cont"> </div> <div class="side_cont_gallery"> </div> <div class="side_cont_gallery"> </div> </div> <div id="footer"> </div> </div> </body> </html>You can note that we use #ID's and .CLASSes, this to have the chance to target our element specifically, so that we can manipulate the specific element uniquely. Remember that ID's are unique and they have a special browser functionaly. If you add a URL like http://example.com/post-1#comments in your address bar, the browser will attempt to find the element with the ID "comments" and will automatically scroll the page to display that specific element. Do you want learn more about ID's and CLASSes and their differences? Read "The Difference Between ID and Class" by Chris Coyeir.
Step 2 - Header
As said, the #header is out of the #main_container because its background will have to cover the entire width of the browser window. We need, at this point, to add a new "wrapper" element for the header section that contains the header's elements within 1000px, the .head_cont will perform this task. Then we create the divs for the logo (we use the <h1> tag - read definition and usage on W3Cschools.com - to display the logo, the most important heading tag) and the #right_header section where we place the unordered list <ul> for sign-up and login buttons. The simple search form is built using form, fieldset and input (defining the "type" attribute) tags.<div id="header"> <div class="head_cont"> <div class="logo"> <h1><a href="#">Footy, the largest football community</a></h1> </div> <div class="right_header"> <ul class="top_navigation"> <li><a href="#">Sign-up</a></li> <li><a class="blue" href="#">Login</a></li> </ul> <div class="slogan"> <h2>football community, redefinited!</h2> <form action="https://wegraphics.net/search" method="get"> <fieldset> <input type="image" src="images/search.jpg" value="Search" /> <input type="text" onfocus="if(this.value=='SEARCH FOR SOMETHING')this.value='';" onblur="if(this.value=='')this.value='SEARCH FOR SOMETHING';" name="keywords" id="search" value="SEARCH FOR SOMETHING" size="40" /> </fieldset> </form> </div> </div> </div> </div>The code onfocus="if(this.value=='SEARCH FOR SOMETHING')this.value='';" onblur="if(this.value=='')this.value='SEARCH FOR SOMETHING';" name="keywords" id="search" value="SEARCH FOR SOMETHING" allows us to add a particular feature. When the user clicks on the text input the string "SEARCH FOR SOMETHING" will be deleted to adding a new string for the search, if the user re-clicks on the page without starting the search the string "SEARCH FOR SOMETHING" will be displayed again.
Step 3 - Content area
The #content is inside the #main_container, as you can see.<body> <div id="header"> </div> <div id="main_container"> <div id="content"> <div class="featured_articles"> </div> <div class="other_articles"> </div> </div> ... </div> </body>We can add the elements of this section in our index.html.
<div id="content">

		<div class="featured_articles">

			<div class="top_article">
				<a href="#"><img src="images/photos/top_article_img.jpg" title="top article title" alt="top article" /></a>
				<h2 class="b_tit_serie_a"><a href="#">Match Review: Juventus versus Sampdoria</a></h2>
				<span class="cat cat_bck_serie_a"><a href="#">Serie A</a></span>
			</div>

			<div class="single_feat_article">
				<a href="#"><img src="images/photos/top_article_img_02.jpg" title="article title" alt="article image 02" /></a>
				<h2 class="b_tit_training"><a href="#">We need to improve our defending skills to win</a></h2>
				<span class="cat cat_bck_training"><a href="#">Training</a></span>
			</div>

			<div class="single_feat_article">
				<a href="#"><img src="images/photos/top_article_img_03.jpg" title="article title" alt="article image 03" /></a>
				<h2 class="b_tit_liga"><a href="#">It was a good performance from the team and they won</a></h2>
				<span class="cat cat_bck_liga"><a href="#">Liga</a></span>
			</div>

			<div class="single_feat_article">
				<a href="#"><img src="images/photos/top_article_img_04.jpg" title="article title" alt="article image 04" /></a>
				<h2 class="b_tit_training"><a href="#">We need to improve our defending skills to win</a></h2>
				<span class="cat cat_bck_training"><a href="#">Training</a></span>
			</div>

			<div class="single_feat_article">
				<a href="#"><img src="images/photos/top_article_img_05.jpg" title="article title" alt="article image 05" /></a>
				<h2 class="b_tit_liga"><a href="#">It was a good performance from the team and they won</a></h2>
				<span class="cat cat_bck_liga"><a href="#">Liga</a></span>
			</div>

		</div>

		<div class="other_articles">
		<div class="sec_tit"><h4>All entries</h4></div>

			<div class="article_list">
			<h4 class="b_tit_basket"><a class="cat_bck_basket" href="#">Basket</a></h4>
			<ul>
				<li class="bck"><a href="#"><img src="images/photos/article_img_01.jpg" title="another article title" alt="bottom article image 01" /></a><h3><a href="#">Team had keeper's heroics to thank for salvaging them a point</a></h3><span class="read_more"><a href="#">read more</a></span></li>
				<li><a href="#"><img src="images/photos/article_img_02.jpg" title="another article title" alt="bottom article image 01" /></a><h3><a href="#">Team had keeper's heroics to thank for salvaging them a point</a></h3><span class="read_more"><a href="#">read more</a></span></li>
				<li class="bck"><a href="#"><img src="images/photos/article_img_03.jpg" title="another article title" alt="bottom article image 01" /></a><h3><a href="#">Team had keeper's heroics to thank for salvaging them a point</a></h3><span class="read_more"><a href="#">read more</a></span></li>
				<li><a href="#"><img src="images/photos/article_img_04.jpg" title="another article title" alt="bottom article image 01" /></a><h3><a href="#">Team had keeper's heroics to thank for salvaging them a point</a></h3><span class="read_more"><a href="#">read more</a></span></li>
			</ul>
			</div>

			<div class="article_list_r">
			<h4 class="b_tit_liga"><a class="cat_bck_liga" href="#">Liga</a></h4>
			<ul>
				<li class="bck"><a href="#"><img src="images/photos/article_img_05.jpg" title="another article title" alt="bottom article image 01" /></a><h3><a href="#">Team had keeper's heroics to thank for salvaging them a point</a></h3><span class="read_more"><a href="#">read more</a></span></li>
				<li><a href="#"><img src="images/photos/article_img_06.jpg" title="another article title" alt="bottom article image 01" /></a><h3><a href="#">Team had keeper's heroics to thank for salvaging them a point</a></h3><span class="read_more"><a href="#">read more</a></span></li>
				<li class="bck"><a href="#"><img src="images/photos/article_img_07.jpg" title="another article title" alt="bottom article image 01" /></a><h3><a href="#">Team had keeper's heroics to thank for salvaging them a point</a></h3><span class="read_more"><a href="#">read more</a></span></li>
				<li><a href="#"><img src="images/photos/article_img_08.jpg" title="another article title" alt="bottom article image 01" /></a><h3><a href="#">Team had keeper's heroics to thank for salvaging them a point</a></h3><span class="read_more"><a href="#">read more</a></span></li>
			</ul>
			</div>

			<div class="article_list">
			<h4 class="b_tit_training"><a class="cat_bck_training" href="#">Training</a></h4>
			<ul>
				<li class="bck"><a href="#"><img src="images/photos/article_img_08.jpg" title="another article title" alt="bottom article image 01" /></a><h3><a href="#">Team had keeper's heroics to thank for salvaging them a point</a></h3><span class="read_more"><a href="#">read more</a></span></li>
				<li><a href="#"><img src="images/photos/article_img_07.jpg" title="another article title" alt="bottom article image 01" /></a><h3><a href="#">Team had keeper's heroics to thank for salvaging them a point</a></h3><span class="read_more"><a href="#">read more</a></span></li>
				<li class="bck"><a href="#"><img src="images/photos/article_img_06.jpg" title="another article title" alt="bottom article image 01" /></a><h3><a href="#">Team had keeper's heroics to thank for salvaging them a point</a></h3><span class="read_more"><a href="#">read more</a></span></li>
				<li><a href="#"><img src="images/photos/article_img_05.jpg" title="another article title" alt="bottom article image 01" /></a><h3><a href="#">Team had keeper's heroics to thank for salvaging them a point</a></h3><span class="read_more"><a href="#">read more</a></span></li>
			</ul>
			</div>

			<div class="article_list_r">
			<h4 class="b_tit_serie_a"><a class="cat_bck_serie_a" href="#">Serie A</a></h4>
			<ul>
				<li class="bck"><a href="#"><img src="images/photos/article_img_04.jpg" title="another article title" alt="bottom article image 01" /></a><h3><a href="#">Team had keeper's heroics to thank for salvaging them a point</a></h3><span class="read_more"><a href="#">read more</a></span></li>
				<li><a href="#"><img src="images/photos/article_img_03.jpg" title="another article title" alt="bottom article image 01" /></a><h3><a href="#">Team had keeper's heroics to thank for salvaging them a point</a></h3><span class="read_more"><a href="#">read more</a></span></li>
				<li class="bck"><a href="#"><img src="images/photos/article_img_02.jpg" title="another article title" alt="bottom article image 01" /></a><h3><a href="#">Team had keeper's heroics to thank for salvaging them a point</a></h3><span class="read_more"><a href="#">read more</a></span></li>
				<li><a href="#"><img src="images/photos/article_img_01.jpg" title="another article title" alt="bottom article image 01" /></a><h3><a href="#">Team had keeper's heroics to thank for salvaging them a point</a></h3><span class="read_more"><a href="#">read more</a></span></li>
			</ul>
			</div>

		<div class="clear"></div>
		</div>

</div>
In .featured_articles section we don't separate the top featured article from the others with a new container for the 2nd-to-5th articles, because we'll use opportunely some CSS properties to reproduce the grid of the layout in a clever way. For the article titles we use the <h2> tag to mantain a good headings structure. In the section called .other_articles we place four unordered lists of articles by categories. Note that we separate the lists on the left side from the lists on the right side (.article_list - .article_list_r), this will allow us to place correctly the elements assigning them the right value of margins. The lists of the artcicles by categories (.article_list) will be placed as floating element (using the CSS float property) and when a float is contained within a container box that has a visible background, that float does not automatically force the container's bottom edge down as the float is made taller and the background will not visible. We use <div class="clear"></div> at the end of the container to fix this problem (in the CSS file we will write the following line of code: .clear { clear: both; })
Step 4 - Sidebar
Below you can see the HTML code to fill the #sidebar section with the widgets that we planned during the creation of the PSD mockup.<div id="sidebar"> <div class="categories_navi"> <ul> <li class="cat_navi_liga"><a href="#">Liga <span class="n_posts">(120 articles)</span></a></li> <li class="cat_navi_world_cup"><a href="#">World Cup <span class="n_posts">(80 articles)</span></a></li> <li class="cat_navi_serie_a"><a href="#">Serie A <span class="n_posts">(41 articles)</span></a></li> <li class="cat_navi_basket"><a href="#">Basket <span class="n_posts">(20 articles)</span></a></li> <li class="cat_navi_training"><a href="#">Training <span class="n_posts">(12 articles)</span></a></li> <li class="cat_navi_fantasy_game"><a href="#">Fantasy Game</a></li> </ul> </div> <div class="social_icons"> <ul> <li class="rss"><a href="#">RSS</a></li> <li class="buzz"><a href="#">Google Buzz</a></li> <li class="facebook"><a href="#">Facebook</a></li> <li class="twitter"><a href="#">Twitter</a></li> </ul> </div> <div class="side_cont"> <h4 class="simple_title">Most popular</h4> <ul> <li><h3><a href="#">We need to improve our defending skills to win</a></h3></li> <li><h3><a href="#">We need to improve our defending skills to win</a></h3></li> <li><h3><a href="#">We need to improve our defending skills to win</a></h3></li> <li><h3><a href="#">We need to improve our defending skills to win</a></h3></li> <li><h3><a href="#">We need to improve our defending skills to win</a></h3></li> </ul> <div class="more"><a href="#">Do you want more articles?<br /> Click here and go to the category</a></div> </div> <div class="side_cont_gallery"> <ul class="gallery_list"> <li><a href="#"><img src="images/photos/photo_arch_01.jpg" title="photo archive title" alt="archive image 01" /></a><h3><a href="#">Match photogallery: Arsenal vs Man Utd</a></h3></li> <li><a href="#"><img src="images/photos/photo_arch_02.jpg" title="photo archive title" alt="archive image 02" /></a><h3><a href="#">Match photogallery: Arsenal vs Man Utd</a></h3></li> <li><a href="#"><img src="images/photos/photo_arch_03.jpg" title="photo archive title" alt="archive image 03" /></a><h3><a href="#">Match photogallery: Arsenal vs Man Utd</a></h3></li> <li><a href="#"><img src="images/photos/photo_arch_04.jpg" title="photo archive title" alt="archive image 04" /></a><h3><a href="#">Match photogallery: Arsenal vs Man Utd</a></h3></li> </ul> <div class="more_photo"><a href="#">Do you want more photos? Click here and go to the category</a></div> <h4 class="photo">Photo</h4> </div> <div class="side_cont_gallery"> <ul class="gallery_list"> <li><a href="#"><img src="images/photos/video_arch_01.jpg" title="photo archive title" alt="archive image 01" /></a><h3><a href="#">Match photogallery: Arsenal vs Man Utd</a></h3></li> <li><a href="#"><img src="images/photos/video_arch_02.jpg" title="photo archive title" alt="archive image 02" /></a><h3><a href="#">Match photogallery: Arsenal vs Man Utd</a></h3></li> <li><a href="#"><img src="images/photos/video_arch_03.jpg" title="photo archive title" alt="archive image 03" /></a><h3><a href="#">Match photogallery: Arsenal vs Man Utd</a></h3></li> <li><a href="#"><img src="images/photos/video_arch_04.jpg" title="photo archive title" alt="archive image 04" /></a><h3><a href="#">Match photogallery: Arsenal vs Man Utd</a></h3></li> </ul> <div class="more_video"><a href="#">Do you want more videos? Click here and go to the category</a></div> <h4 class="video">Video</h4> </div> </div>
Step 5 - Footer
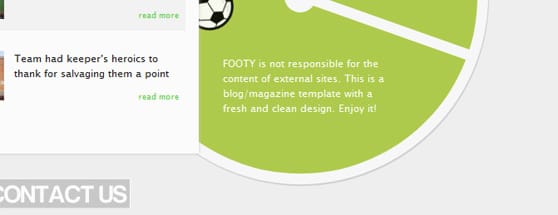
Add the following code to create our footer section. We add two divs, within the #main_container and just below the #sidebar, to reproduce the navigation menu (logo - about us - authors - contact us) and the cresdits ("FOOTY is not responsible for the content of external sites. This is a blog/magazine template with a fresh and clean design. Enjoy it!").<div class="side_foot"> <p>FOOTY is not responsible for the content of external sites. This is a blog/magazine template with a fresh and clean design. Enjoy it!</p> </div> <div id="footer"> <ul> <li class="logo_small"><a href="#">Home</a></li> <li class="about_us"><a href="#">About Us</a></li> <li class="authors"><a href="#">Authors</a></li> <li class="contact_us"><a href="#">Contact Us</a></li> </ul> </div>We can test in our favourite browser the result of our efforts.

 Click here if you want to take a look at the complete HTML code.
From PSD to HTML/CSS - Styling the page
In this part of the post we will see some techniques for adding the style to our template. It's clear that we can't describe how each single CSS property works, but we will take a look at the process that will bring us to our goal, that's to create a complete HTML/CSS web page. At any rate you can solve all your doubts on how a specific CSS property works reading W3Cschools.com - CSS References. There are tons of other resources out there as well, including this guide by Who is Hosting This? and CSS-Tricks.Step 6 - Exctract images from PSD
Another important step, in converting the PSD mockup in a real web page, is the extraction of the necessary images from the PSD. Usual this operation is easy and very intuitive, you can play with layer visibility to "isolate" the layers and you can use the Selection Tool and Copy Merged (shift+ctrl+c), to copy all visible layers within the selection, or Copy (ctrl+c), to copy the active layer within the selection, for pasting the correct image in a new document. Finally save it for Web & Devices (alt+shift+ctrl+s), it's clear that if you have an image with a transparent background you have to save it as PNG and not JPG.


Step 7 - CSS Reset
Open style.css in your text editor and start with a little, custom, CSS Reset.
html, body, div, span, h1, h2, h3, h4, h5, h6, p, img, ul, li, fieldset, form, label { margin: 0; padding: 0; border: 0; outline: 0; font-size: 100%; vertical-align: baseline; background: transparent; }

ol, ul { list-style: none; }

h1, h2, h3, h4, h5, h6 { font-weight: normal; }

:focus { outline: 0; }

a { text-decoration: none; }
Step 8 - Wrap the main elements
Now we have to work on the general structure. First of all we place the structural elements where they should be.
body { background: #eee url(images/ball_bck.jpg) no-repeat 14% 6%; font: 12px "Lucida Sans Unicode", sans-serif, Verdana; line-height: 1.5em; color: #1d1d1d; }

#main_container { width: 1000px; margin: 0 auto; background: url(images/illustration.png) no-repeat bottom right;}

#header { background: url(images/head_bck.jpg) repeat-x; }
	.head_cont { background: url(images/head_shadow.jpg) no-repeat bottom; height: 160px; width: 1000px; margin: 0 auto; }


#content { float: left; background: url(images/cont_bck.jpg) no-repeat; width: 680px; }


#sidebar { float: right; width: 320px; }

.side_foot { width: 200px; float: left; margin-top: 85px; }
.side_foot p { color: #fff; }

#footer { clear: both; padding: 10px 0; margin-bottom: 80px; }
We use float: right; width: 320px; for the sidebar and float: left; width: 680px; for the content, this for two reasons: we don't need to add explicit margins (between the content area and the sidebar) and we'll have all the necessary space to add the feature articles from the 2nd to the 5th.


Step 9 - CSS for the header
Below you can take a look at the CSS code useful to reproduce all elements of the header.
#header { background: url(images/head_bck.jpg) repeat-x; }
	.head_cont { background: url(images/head_shadow.jpg) no-repeat bottom; height: 160px; width: 1000px; margin: 0 auto; }
		.logo { float: left; margin-top: 20px; }
		.logo h1 a { background: url(images/logo.png) no-repeat 0px 0px; display: block; width: 397px; height: 104px; text-indent: -9999px; }
		.logo h1 a:hover { background-position: 0px -104px; }
		ul.top_navigation { float: right; margin-top: 20px; }
		ul.top_navigation li { display: inline; }
		ul.top_navigation li a { display: inline-block; background-color: #97bd0e; font-size: 14px; text-transform: uppercase; color: #fbfbfb; font-weight: bold; padding: 6px 10px; margin-left: 10px; text-shadow: 1px 1px 1px #7d9d0c; }
		ul.top_navigation li a:hover { background-color: #b5dd27; color: #fff; }
		ul.top_navigation li a.blue { background-color: #029de0; text-shadow: 1px 1px 1px #0184bc; }
		ul.top_navigation li a.blue:hover { background-color: #20b4f4; color: #fff; }
		.right_header{ float: right; }
		.slogan { float: right; clear: both; margin-top: 25px; background: #000; height: 43px; width: 580px; }
		.slogan h2 { float: left; background: url(images/slogan.jpg) no-repeat; text-indent: -9999px; display: block; width: 231px; height: 14px; margin: 15px 10px; }
		.right_header input[type="text"] { color: #b3b3b3; padding: 6px 10px; float: right; margin: 8px 12px 0 0; font-size: 12px; border: none; }
		.right_header input[type="image"] { float: right; margin-top: 6px; }
Using the properties background and background-position for .logo h1 a and .logo h1 a:hover (:hover is a pseudo class that adds a style to an element when you mouse over it) we can create a super-repsonsive hover effect. This technique is known as "CSS Sprites", it allows us, using unlimited number of images combined into one and correct values of background-position, to create responsive buttons.
Learn more about "CSS Sprites" reading Building Faster Websites with CSS Sprites

Step 10 - CSS for the content
Add the following lines of code for the classes of the #content section.#content { float: left; background: url(images/cont_bck.jpg) no-repeat; width: 680px; }
.featured_articles { margin: 40px 0; }
.top_article { height: 335px; }
.single_feat_article { float: left; height: 241px; width: 311px; margin-right: 29px; margin-bottom: 25px; }
.top_article img, .single_feat_article img { border: 10px solid #fbfbfb; -moz-box-shadow: 0px 0px 5px #c6c6c6; -webkit-box-shadow: 0px 0px 5px #c6c6c6; -khtml-box-shadow: 0px 0px 5px #c6c6c6; box-shadow: 0px 0px 5px #c6c6c6; }
.top_article h2 { position: relative; top: -150px; left: 10px; background: #fbfbfb; padding: 10px 8px 12px 8px; width: 290px; }
.featured_articles h2 a { color: #1d1d1d; }
.featured_articles h2 a:hover { color: #898988; }
.top_article span.cat { position: relative; top: -160px; left: 285px; padding: 2px 10px; font-size: 10px; text-transform: uppercase; }
span.cat a { color: #fff; }
.single_feat_article h2 { position: relative; top: -120px; left: 10px; background: #fbfbfb; padding: 8px 5px 11px 5px; width: 235px; font-size: 16px; }
.single_feat_article span.cat { position: relative; top: -130px; left: 220px; padding: 2px 10px; font-size: 10px; text-transform: uppercase; }
.b_tit_serie_a { border-bottom: 2px solid #67bcf5; }
.cat_bck_serie_a { background: #67bcf5; }
.b_tit_training { border-bottom: 2px solid #5bcc49; }
.cat_bck_training { background: #5bcc49; }
.b_tit_liga { border-bottom: 2px solid #e7aa11; }
.cat_bck_liga { background: #e7aa11; }
.b_tit_basket { border-bottom: 2px solid #98ba1c; }
.cat_bck_basket { background: #98ba1c; }
.other_articles { background: #fbfbfb; padding: 10px; -moz-box-shadow: 0px 0px 5px #c6c6c6; -webkit-box-shadow: 0px 0px 5px #c6c6c6; -khtml-box-shadow: 0px 0px 5px #c6c6c6; box-shadow: 0px 0px 5px #c6c6c6; width: 631px; clear: both; }
.sec_tit { background: url(images/line.gif) no-repeat right; margin: 10px 0 15px 0; }
.sec_tit h4 { color: #b3b3b3; font-size: 14px; }
.article_list, .article_list_r { width: 290px; float: left; margin: 10px 0; }
.article_list_r { margin: 10px 0 20px 45px; }
.other_articles ul { position: relative; top: -10px; }
.other_articles ul li { clear: both; height: 60px; margin: 10px 0; padding: 14px 0px; }
.other_articles ul li:hover, .other_articles ul li.bck:hover { border-right: 2px solid #e5e5e5; }
.other_articles ul li.bck { background: #f2f2f1; }
.other_articles h4 a { padding: 2px 10px; font-size: 10px; text-transform: uppercase; color: #fff; position: relative; top: 10px; z-index: 100; }
.other_articles h3 a { display: block; }
.other_articles h3 a:hover { color: #898988; }
.other_articles img { float: left; margin: 0 12px; }
span.read_more { float: right; font-size: 10px; margin: 10px 8px; }
span.read_more a { color: #5bcc49; }
span.read_more a:hover { color: #379029; }
.clear { clear: both; }
We use position: relative (that generates a relatively positioned element, positioned relative to its normal position) to place titles and categories at the middle of the image.
The box-shadow is a CSS3 property. It is not a standard yet, but we can use right now some CSS3 properties because all modern browsers render CSS3 excellently.

Step 11 - CSS for the sidebar
Now we can add the style to the navigation menu and to the other widgets of the sidebar.
#sidebar { float: right; width: 320px; }
	.categories_navi { position: relative; top: -9px; }
	.categories_navi ul { width: 322px; border-right: 1px solid #fff; height: 105px; -moz-box-shadow: 2px 2px 0px #d6d6d6; -webkit-box-shadow: 2px 2px 0px #d6d6d6; -khtml-box-shadow: 2px 2px 0px #d6d6d6; box-shadow: 2px 2px 0px #d6d6d6; }
	.categories_navi ul li { display: inline;  float: left;}
	.categories_navi ul li a { width: 145px; height: 24px; display: inline-block; text-transform: uppercase; font-size: 11px; border-left: 1px solid #fff; border-bottom: 1px solid #fff; color: #fff; padding: 10px 0 0 15px; }
	span.n_posts { font-size: 8px; }
	.cat_navi_liga { background: url(images/cat_navi_1.jpg) repeat-x 0px 0px; }
	.cat_navi_world_cup { background: url(images/cat_navi_2.jpg) repeat-x 0px 0px; }
	.cat_navi_serie_a { background: url(images/cat_navi_3.jpg) repeat-x 0px 0px; }
	.cat_navi_training { background: url(images/cat_navi_5.jpg) repeat-x 0px 0px; }
	.cat_navi_basket { background: url(images/cat_navi_4.jpg) repeat-x 0px 0px; }
	.cat_navi_fantasy_game { background: url(images/cat_navi_6.jpg) repeat-x 0px 0px; }
	.cat_navi_liga:hover, .cat_navi_world_cup:hover, .cat_navi_serie_a:hover, .cat_navi_training:hover, .cat_navi_basket:hover, .cat_navi_fantasy_game:hover { background-position: 0px -34px; }

	.social_icons { padding: 20px 0 9px 9px; }
	.social_icons  ul li { display: inline; }
	.social_icons  ul li a { display: inline-block; width: 48px; height: 48px; text-indent: -9999px; margin-left: 20px; }
	.rss a { background: url(images/rss.jpg) 0px 0px; }
	.rss a:hover { background-position: 0px -48px; }
	.buzz a { background: url(images/buzz.jpg) 0px 0px; }
	.buzz a:hover { background-position: 0px -48px; }
	.facebook a { background: url(images/facebook.jpg) 0px 0px; }
	.facebook a:hover { background-position: 0px -48px; }
	.twitter a { background: url(images/twitter.jpg) 0px 0px; }
	.twitter a:hover { background-position: 0px -48px; }

	.side_cont, .side_cont_gallery { background: #fbfbfb; -moz-box-shadow: 0px 0px 5px #c6c6c6; -webkit-box-shadow: 0px 0px 5px #c6c6c6; -khtml-box-shadow: 0px 0px 5px #c6c6c6; box-shadow: 0px 0px 5px #c6c6c6; padding: 25px 20px; margin: 20px 0;}
	.side_cont h4.simple_title { background: #000; padding: 5px 10px; font-size: 12px; color: #fff; margin-bottom: 15px; display: inline-block; text-transform: uppercase; }
	.side_cont ul li { font-size: 14px; border-bottom: 1px solid #d9d9d9; padding: 10px 4px; }
	#sidebar h3 a { display: block; }
	#sidebar h3 a:hover { color: #898988; }
	.more, .more_photo, .more_video  { width: 200px; margin-top: 20px; font-size: 10px; line-height: 15px; }
	.more a { color: #daa215; display: block; }
	.more a:hover { color: #aa821e; }
	.more_photo, .more_video { border-top: 1px solid #d9d9d9; clear: both; margin-left: 20px; padding-top: 10px; }
	.more_photo a { color: #67bcf5; display: block; }
	.more_video a { color: #5bcc49; display: block; }
	.more_photo a:hover { color: #4c91bf; }
	.more_video a:hover { color: #379029; }
	.side_cont_gallery { padding: 25px 0; margin: 30px 0 93px 0; }
	.side_cont_gallery ul.gallery_list li { border: none; display: inline; float: left; width: 133px; margin: 0 0 25px 19px; }
	.side_cont_gallery h4.video { display: block; position: relative; bottom: 49px; left: 36px; float: right; width: 139px; height: 139px; background: url(images/video_tit.png) no-repeat; text-indent: -9999px; }
	.side_cont_gallery h4.photo { display: block; position: relative; bottom: 46px; left: 36px; float: right; width: 139px; height: 139px; background: url(images/photo_tit.png) no-repeat; text-indent: -9999px; }


Step 11 - CSS for the footer
Finally we can add some lines of code for the footer elements..side_foot { width: 200px; float: left; margin-top: 85px; }
.side_foot p { color: #fff; }
#footer { clear: both; padding: 10px 0; margin-bottom: 80px; }
#footer ul { margin: 20px 0; }
#footer ul li { display: inline; float: left; margin-right: 20px; }
.logo_small a { display: block; width: 101px; height: 50px; background: url(images/logo_small.png) no-repeat; text-indent: -9999px; }
.logo_small a:hover { background-position: 0px -50px; }
.about_us a { display: block; width: 100px; height: 36px; background: url(images/about_us.jpg) no-repeat; text-indent: -9999px; }
.about_us a:hover { background-position: 0px -36px; }
.authors a { display: block; width: 133px; height: 36px; background: url(images/authors.jpg) no-repeat; text-indent: -9999px; }
.authors a:hover { background-position: 0px -36px; }
.contact_us a { display: block; width: 175px; height: 36px; background: url(images/contact_us.jpg) no-repeat; text-indent: -9999px; }
.contact_us a:hover { background-position: 0px -36px; }

 That's all, folks! We have our valid HTML/CSS template.
Stay tuned beacause the next week we will release a WordPress Theme based on this tHTML/CSS template.
That's all, folks! We have our valid HTML/CSS template.
Stay tuned beacause the next week we will release a WordPress Theme based on this tHTML/CSS template.
DOWNLOAD PSD + HTML/CSS TEMPLATE
[ Images credits: marlon.net, joncandy, fakelvis, peacecup ]
More from Tutorials

How to Easily Remove Smoke From The Background in Photoshop
Tutorialsby Diego Sanchez
Smoke images can be used in a wide range of applications across various designs, such as adding drama to a photograph, crafting captivating visual effects on posters, or even giving your artwork a mysterious halo. Whichever the case, transparent smoke can serve as a powerful tool in your arsenal. So today, I will show you how easy it is to remove the background from a smoke image, and in the process, prepare the file to change the smoke color at any time you want, allowing you to seamlessly integrate it into your projects.
Read more
Easily Make a Glass Texture Effect in Photoshop
Tutorialsby Diego Sanchez
The glass effect has been used by many designers and photographers to add depth and dimension to their compositions with a touch of modern elegance. There are, of course, many different ways to apply a glass effect in Photoshop, but today I will show you how easy it is to make your own glass texture and apply realistic distortion to any of your images using nothing but the default Photoshop tools.
Read more
How to Easily Make Your Vector Digital Signature
Tutorialsby Diego Sanchez
In today's digital life, whether you are a freelancer, a business owner, or simply someone who frequently engages in digital transactions, having a well-crafted digital signature is almost indispensable to add a touch of authenticity and credibility to your documents. So today, I will show you how easily you can make your own vector digital signature in Illustrator for you to sign your digital documents or incorporate it into any design work.
Read more
Easily Make an Editable Grunge Text Effect in Photoshop
Tutorialsby Diego Sanchez
There are different ways to make a grunge text effect in Photoshop while keeping your text fully editable, and the most known one is to use a texture as a layer mask to hide part of the text. But Today I will show you a differnt approach on how you can make this kind of effect, while keeping you text fully editable and at the same time give you a bit more control over that effect by using a texture in a new layer (instead of a layer mask) that you can later move, scale, replace or combine with other textures without replacing any kind of layer mask.
Read more