
How to Add Blur and Bokeh Effects in Lightroom
Lightroom Effects
Sometimes, we need to edit certain photos to give them a much more pronounced character, and one of the techniques at our disposal is to create a deeper depth of field to highlight our subject. To do this, we have several options: one of them is to manually edit the photo in our preferred application, or we can do it in Lightroom with its new 'Lens Blur' tool. Today, I'm going to show you how simple it is to add a blur effect to a photo while simultaneously adding a Bokeh effect, all without the need for complicated selections and using multiple filters. Instead, we'll simply use the new Lens Blur tool, which is already available in the latest versions of Lightroom.
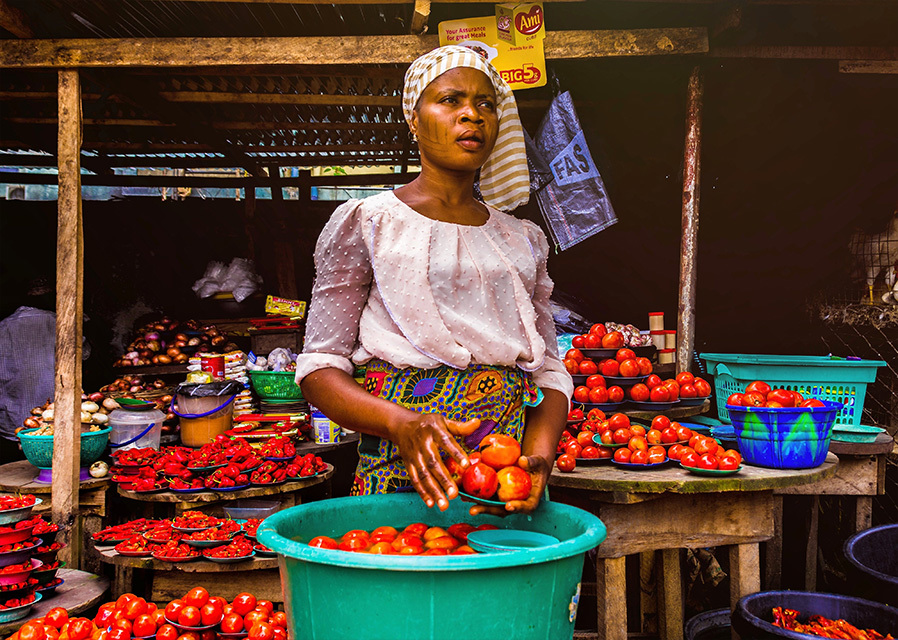
But before we begin, and if you want to follow this tutorial exactly as described, please download the following free picture from Pexels: Download.
Step 1
Open your photo in Lightroom.
Step 2
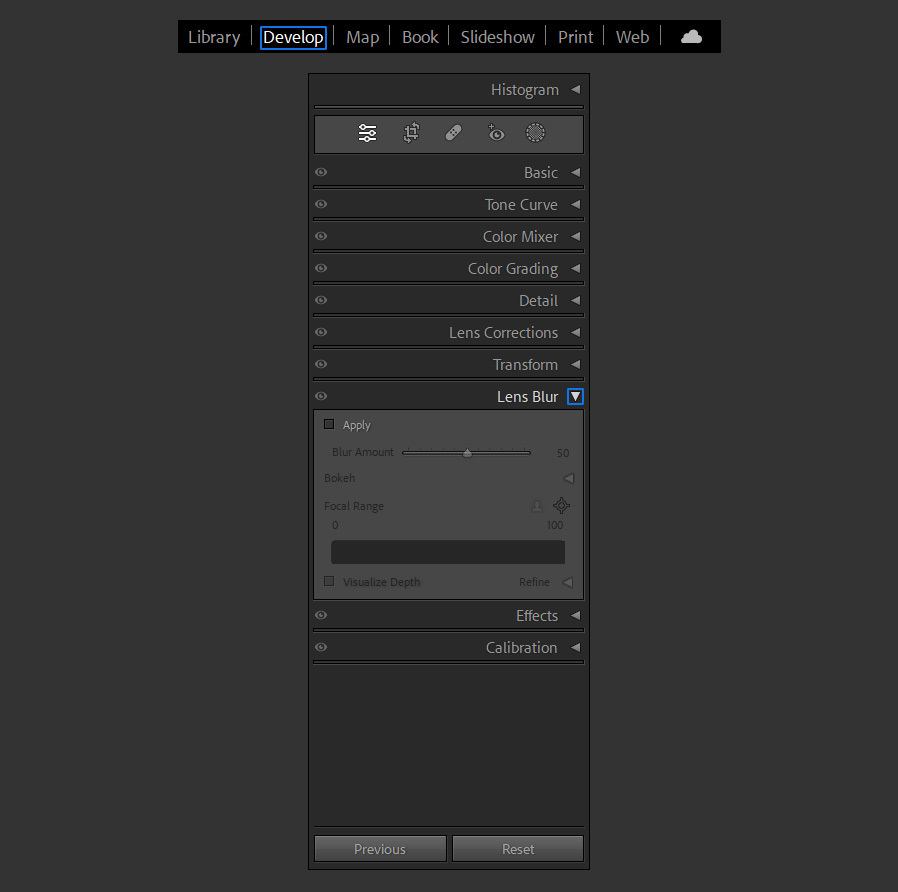
Go to the "Develop" tab and expand the "Lens Blur" module.
Step 3
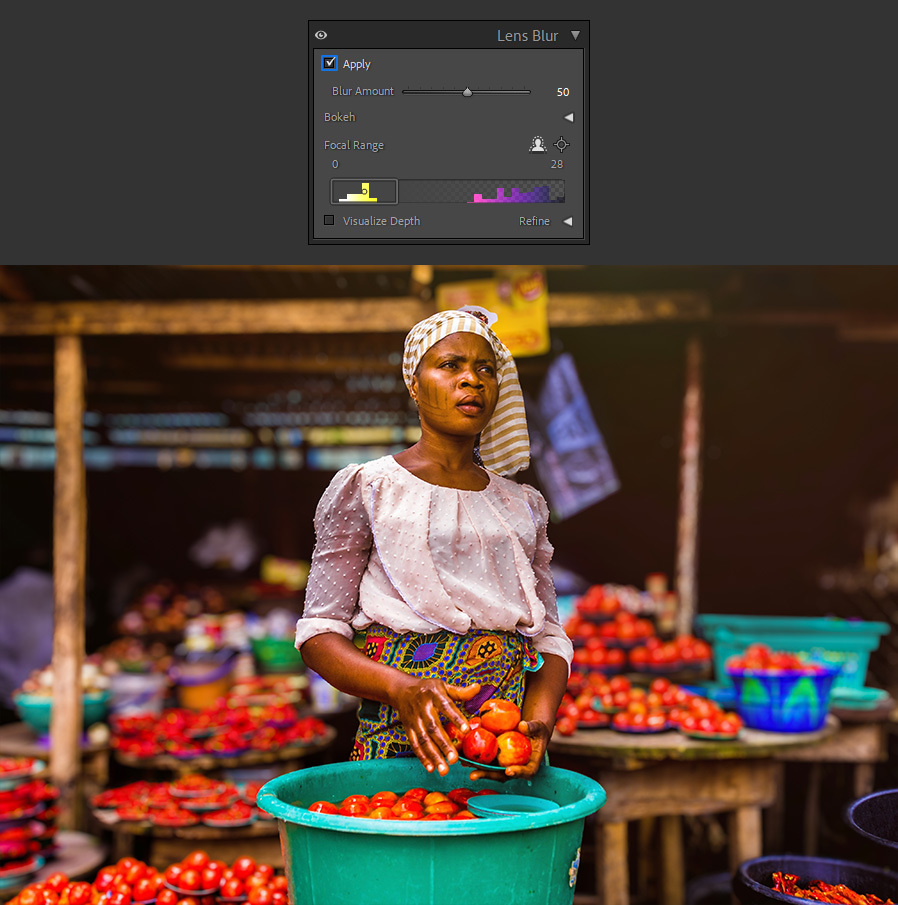
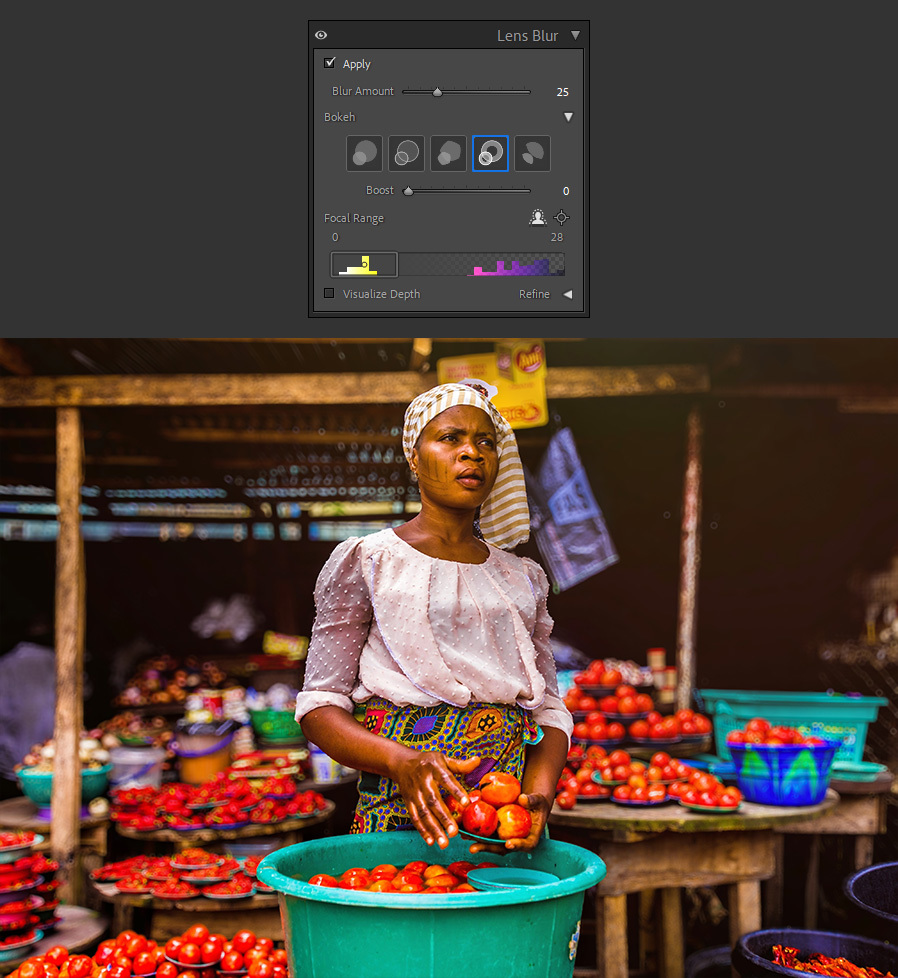
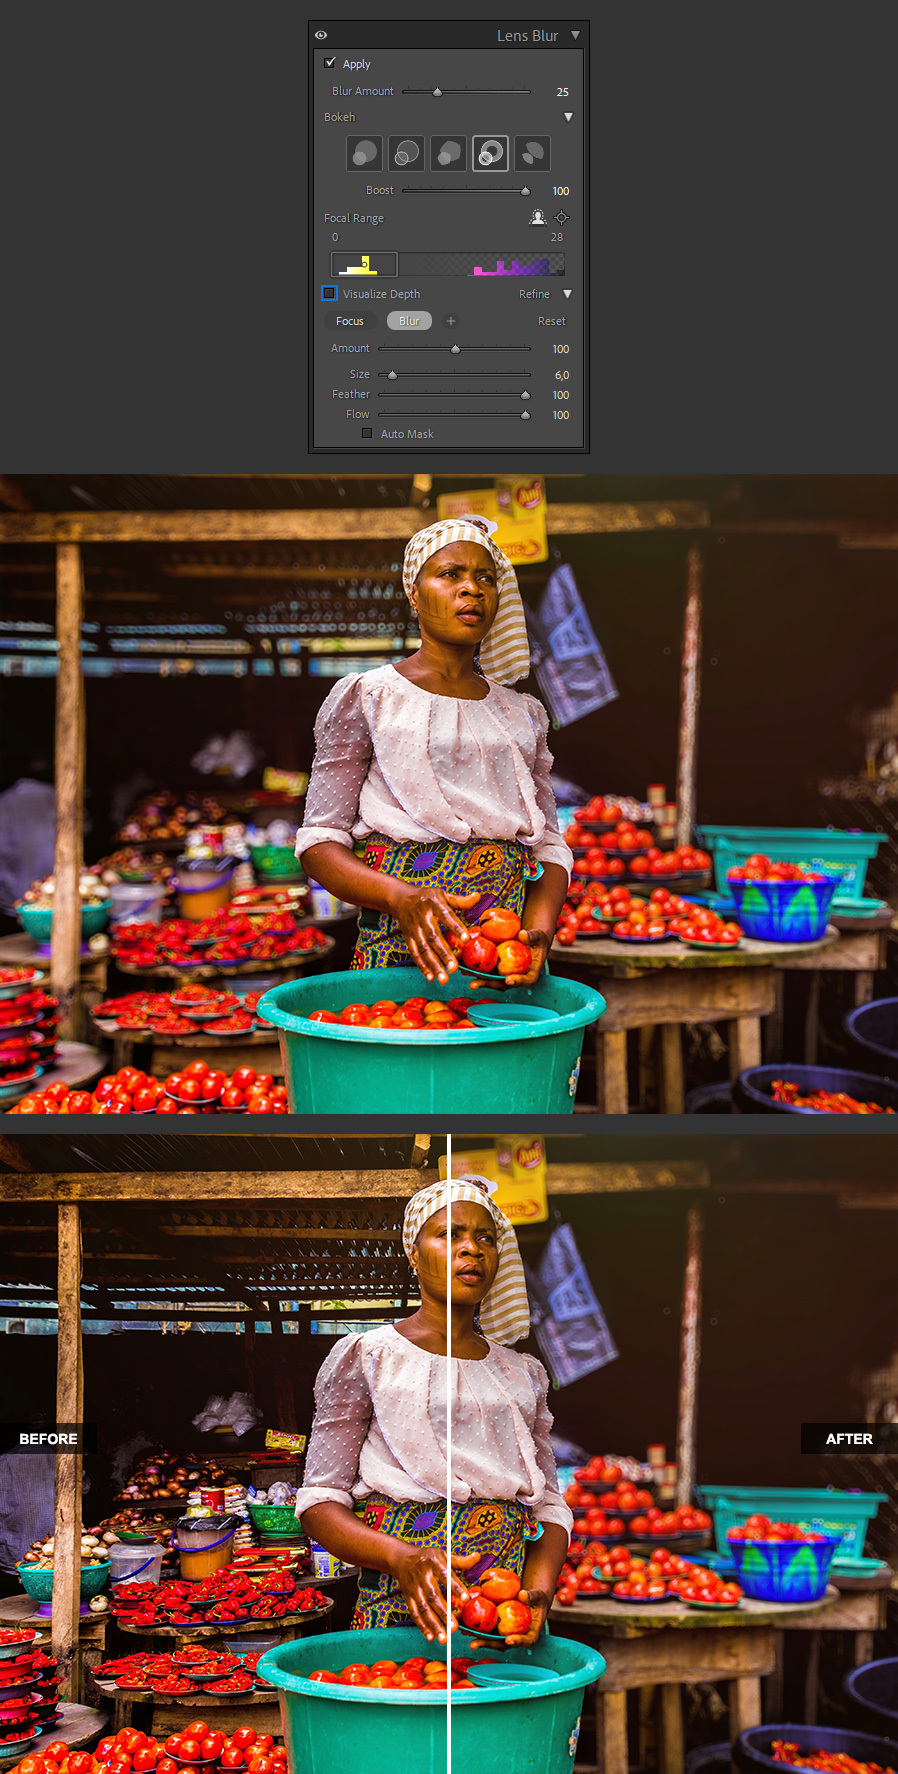
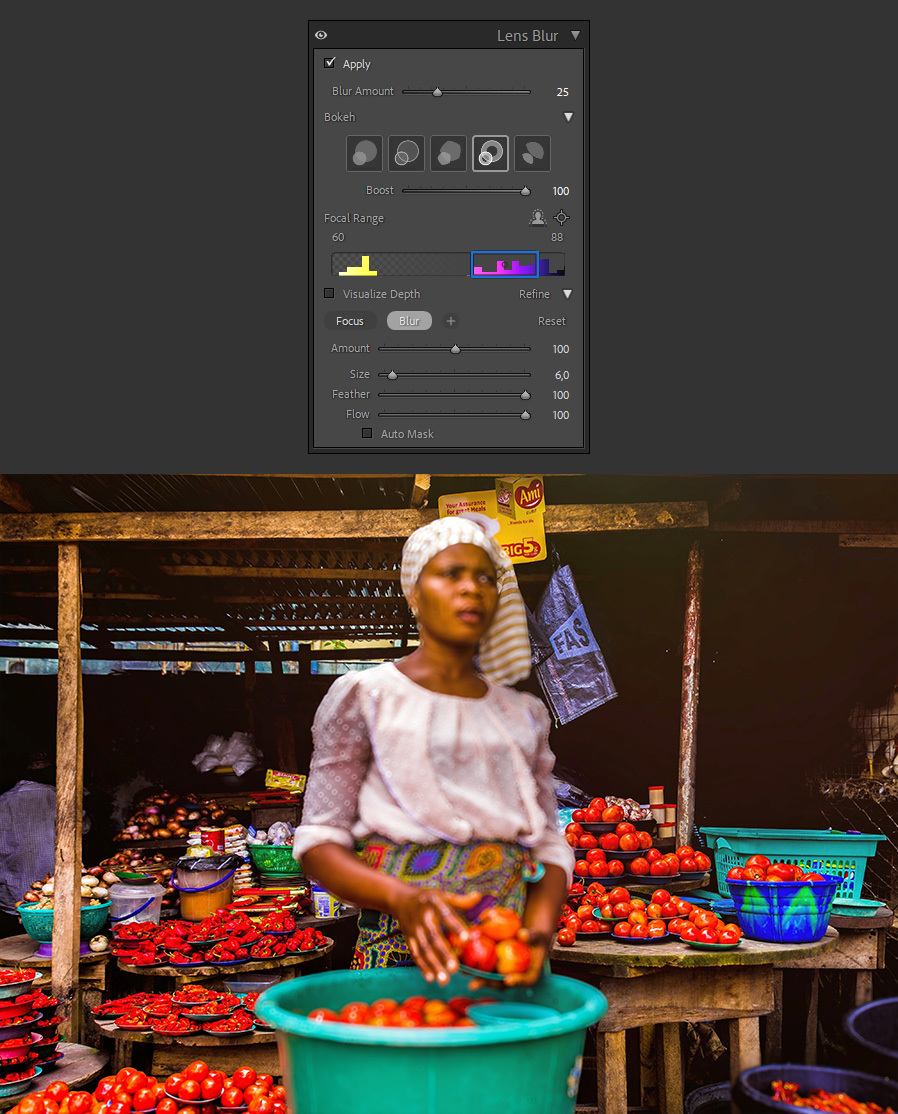
Check the "Apply" option. Lightroom will process the file for a minute to detect the focal range and give you a default Blur Amount result based on A.I.
Step 4
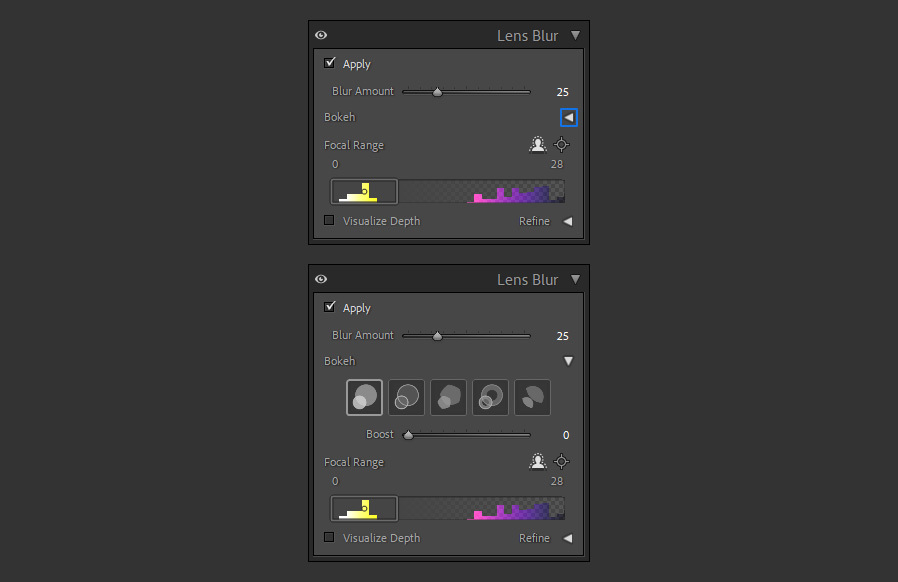
At this point, you may adjust the Blur Amount to your liking dragging the slider left or right until you find a blur amount that you like. In this case, I will set the value to 25.

Step 5
Next, click on the arrow icon of the Bokeh effect to visualize the Bokeh options.
Step 6
Here you may choose from 5 different Bokeh types, from "Circle" to "Cat Eye". Here, I will pick the "Ring" one (also know as Doughnut).
Step 7
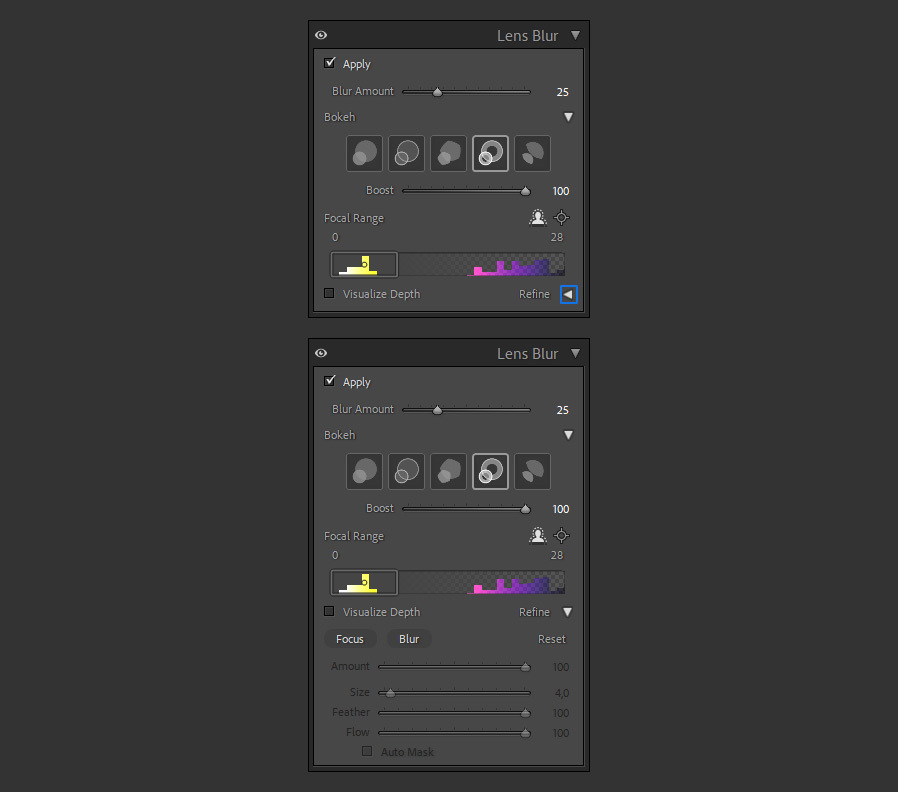
Now you have the option to boost the Bokeh effect (adjust the brightness of the blured light sources). To to that, simply drag the slider left or right until you are happy with the result. In this case, I will set the boost amount of the bokeh effect to 100 since there are not too many light sources in this image.

Step 8
If there are areas that you also want blured (on in focus), but the A.I. did not include them, you can manually adjust those areas. To do that, expand the "Refine" options.
Step 9
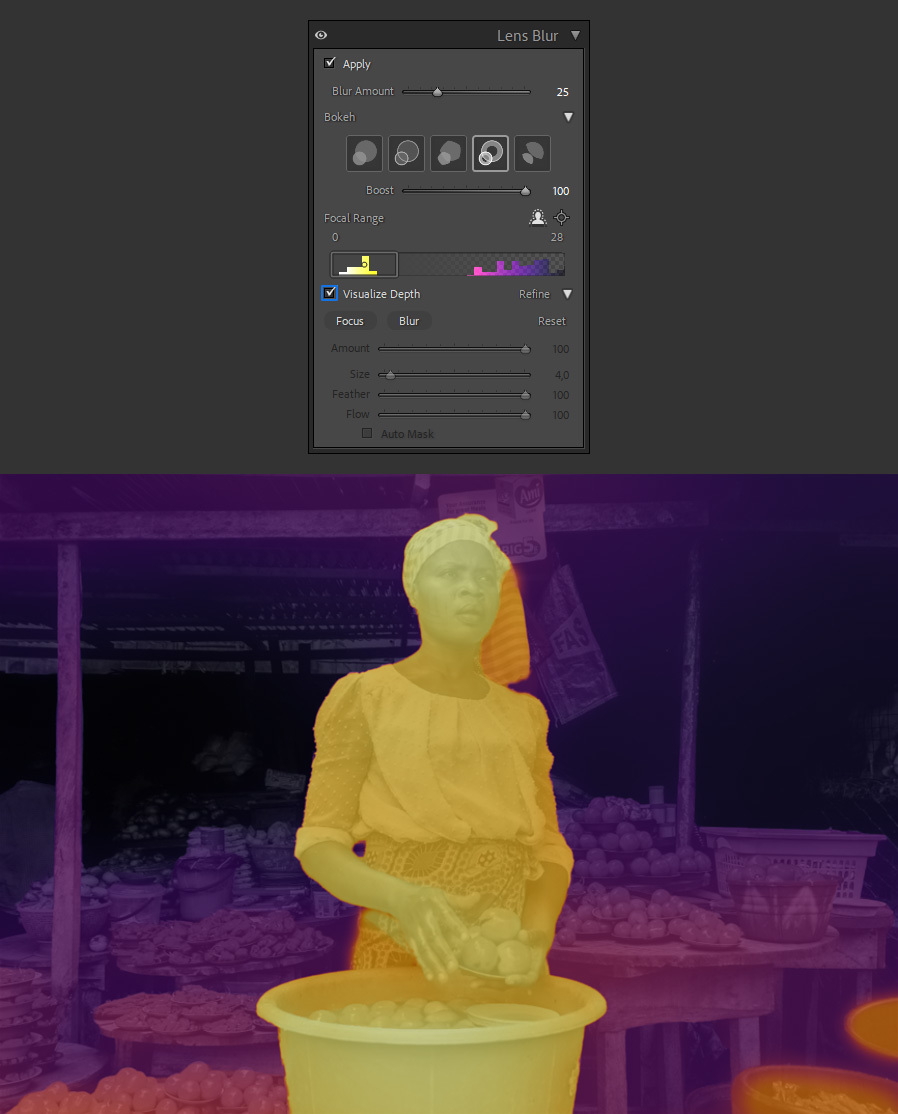
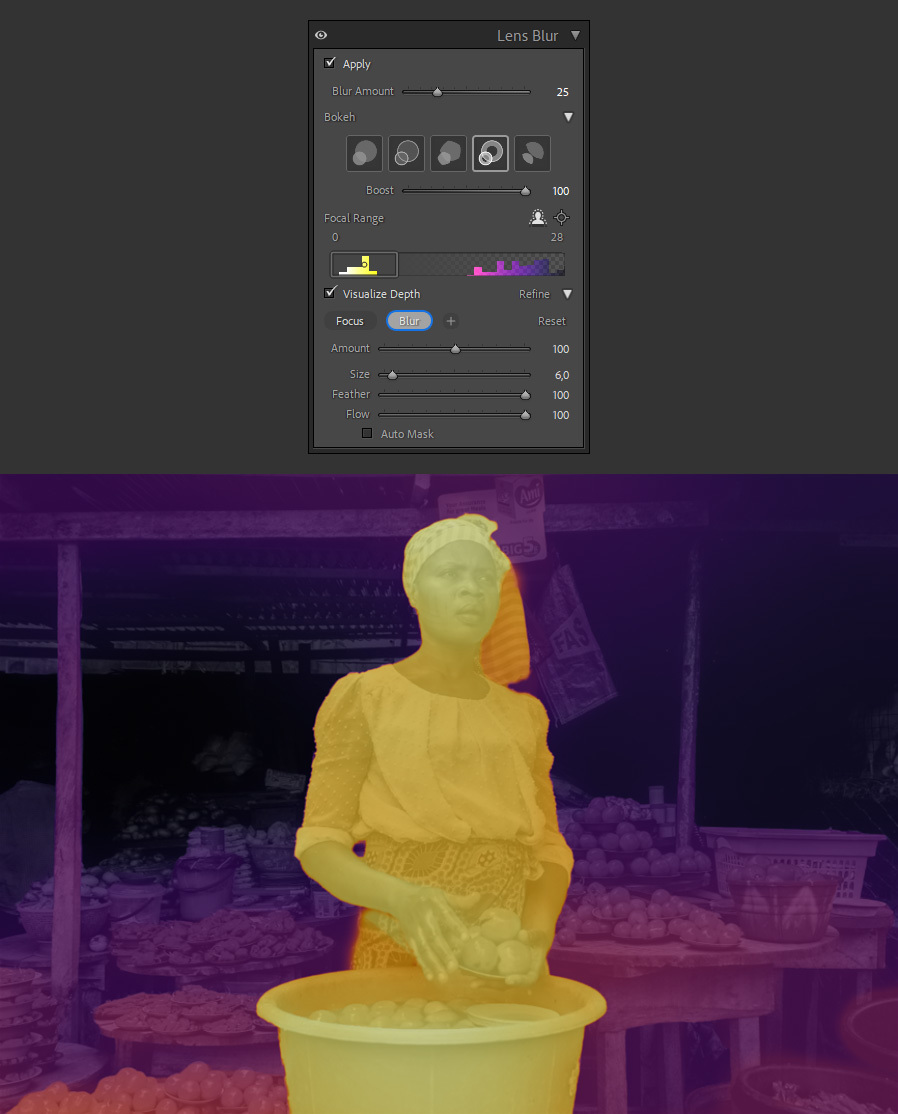
Check the "Visualize Depth" option. The Yellow areas are the ones that are currently in "focus", while the rest is blured. In this example, we will blur those 2 down right barrels.
Step 10
Click the "Blur" button and then simply paint over the areas of the image that you want blured.
Step 11
Lastly, uncheck the "Visualize Depth" option.
A Final Tip:
After you finish editing your image, you can also swap the focus/blur areas simply by dragging the Focal Range slider.
More from Tutorials

How to Easily Remove Smoke From The Background in Photoshop
Tutorialsby Diego Sanchez
Smoke images can be used in a wide range of applications across various designs, such as adding drama to a photograph, crafting captivating visual effects on posters, or even giving your artwork a mysterious halo. Whichever the case, transparent smoke can serve as a powerful tool in your arsenal. So today, I will show you how easy it is to remove the background from a smoke image, and in the process, prepare the file to change the smoke color at any time you want, allowing you to seamlessly integrate it into your projects.
Read more
Easily Make a Glass Texture Effect in Photoshop
Tutorialsby Diego Sanchez
The glass effect has been used by many designers and photographers to add depth and dimension to their compositions with a touch of modern elegance. There are, of course, many different ways to apply a glass effect in Photoshop, but today I will show you how easy it is to make your own glass texture and apply realistic distortion to any of your images using nothing but the default Photoshop tools.
Read more
How to Easily Make Your Vector Digital Signature
Tutorialsby Diego Sanchez
In today's digital life, whether you are a freelancer, a business owner, or simply someone who frequently engages in digital transactions, having a well-crafted digital signature is almost indispensable to add a touch of authenticity and credibility to your documents. So today, I will show you how easily you can make your own vector digital signature in Illustrator for you to sign your digital documents or incorporate it into any design work.
Read more
Easily Make an Editable Grunge Text Effect in Photoshop
Tutorialsby Diego Sanchez
There are different ways to make a grunge text effect in Photoshop while keeping your text fully editable, and the most known one is to use a texture as a layer mask to hide part of the text. But Today I will show you a differnt approach on how you can make this kind of effect, while keeping you text fully editable and at the same time give you a bit more control over that effect by using a texture in a new layer (instead of a layer mask) that you can later move, scale, replace or combine with other textures without replacing any kind of layer mask.
Read more