
Create a Sweet Chocolate-Coated Text Effect
This Photoshop tutorial is thought for greedy people (like me!). Today we will create a delicious chocolate-covered text effect. We will create some details on paper, then we will work with layer styles to achieve the nice result.
Preview:
Click on the image for a full size preview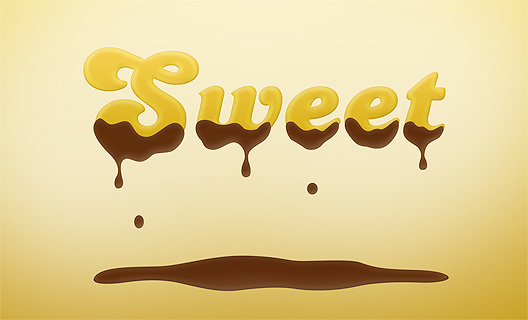
DOWNLOAD SOURCE FILE
Support Material
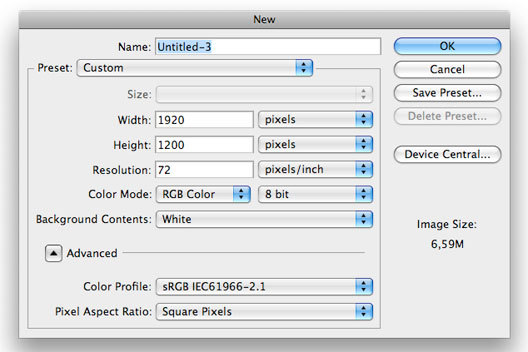
Step 1
Open a new document in Photoshop. Since I want to create a wallpaper, my size is 1920x1200 pixels, but you can set up to the size of your desktop. Resolution is 72 pixels/inch, which is perfect while working on a computer destined project.
Step 2
Using the Candice font, write "Sweet" with the Horizontal Type tool (T). Font size is 380pt. Choose a light color because we will print this document and we will sketch over the text to create the chocolate pending effect.

Step 3
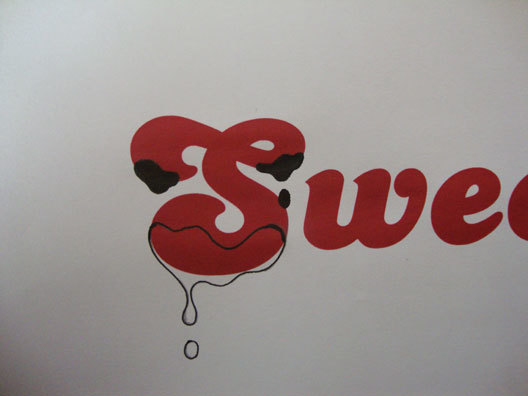
Print the image. I think it's easier to create the chocolate effect on paper rather than immediately use the pen tool. For those who have a tablet, it's more convenient to work directly in Photoshop. However I decided to dirty a bit my hand.
Start painting the chocolate as shown in the following screenshots:
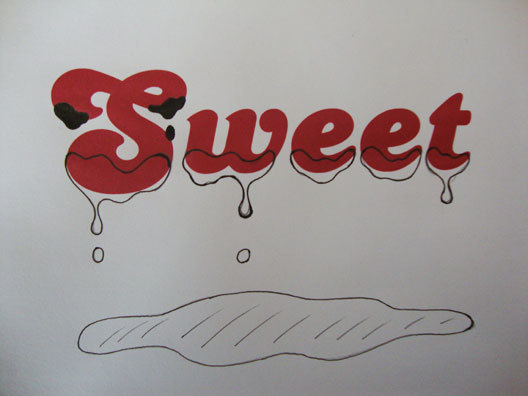
Step 4
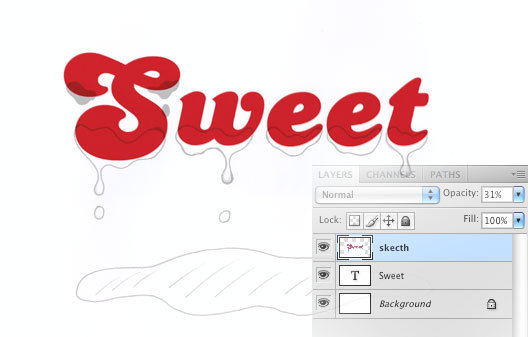
Scan the image and paste it on your Photoshop document. Place it above the text and reduce the opacity of the sketch at around 30%. In this way you can take the sketch as a reference while using the pen tool in the next step
Step 5
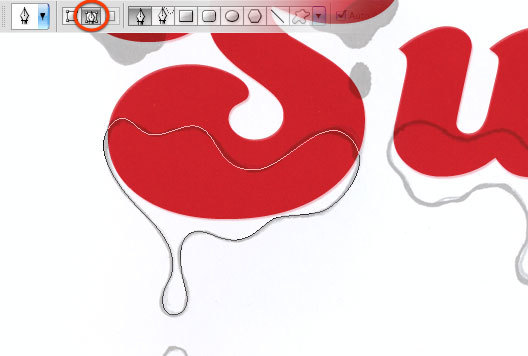
With the pen tool in Paths mode start tracing the chocolate border. Start from the "S"
Step 6
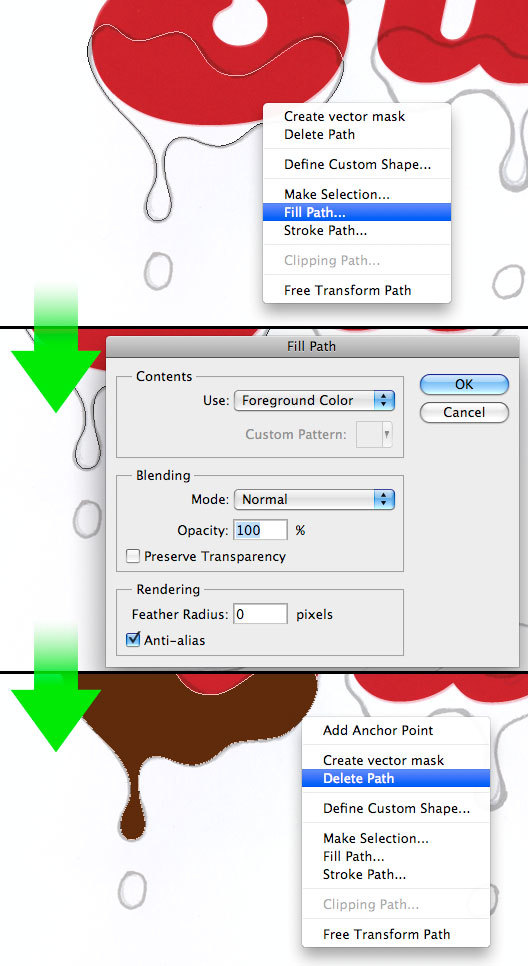
Create a new layer and set the foreground color to brown (#602b0b). With the pen tool still active, right-click on the canvas and select "fill path". In the next window set "use foreground color" and hit OK. Right click again and select "delete path".
Step 7
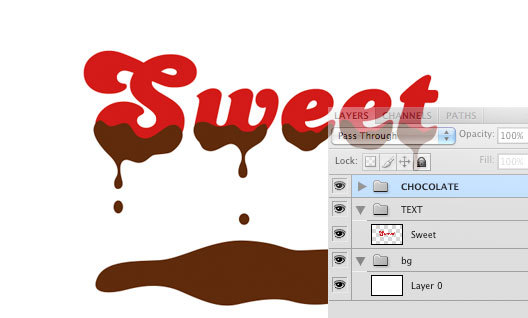
Use the same technique to create the other shapes, then hide the sketch layer visibility.
Select all the chocolate shapes and group them (ctrl+G) to make order.
Step 8
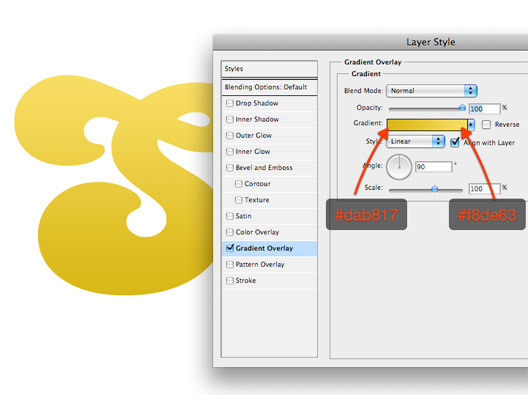
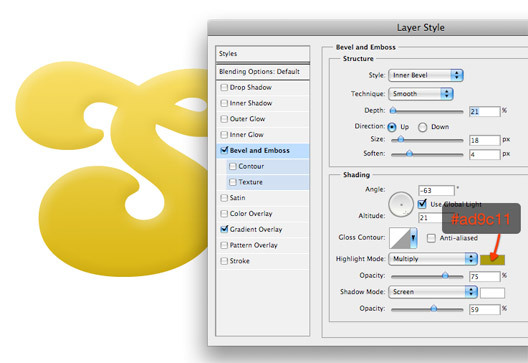
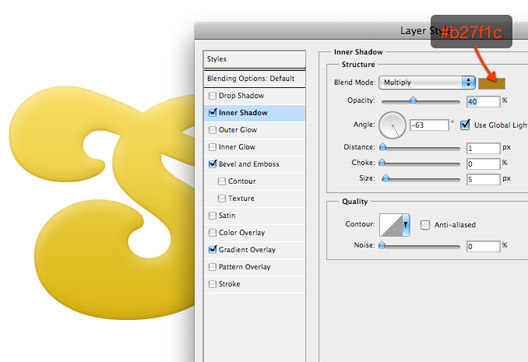
At this point we will add some layer styles. Let's start from the text. Hide the chocolate group for the moment. Right-click on the text layer and select "blending options". We will add gradient overlay, bevel and emboss, satin and inner shadow. The aim is to create a kind of golden 3d text effect. The following screenshots will show the settings.
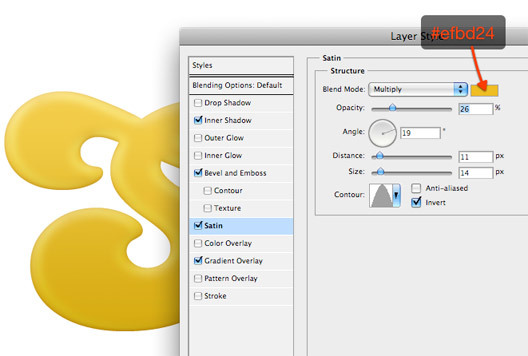

The text is complete. It remembers me text effects used on cereal packaging.
Step 9
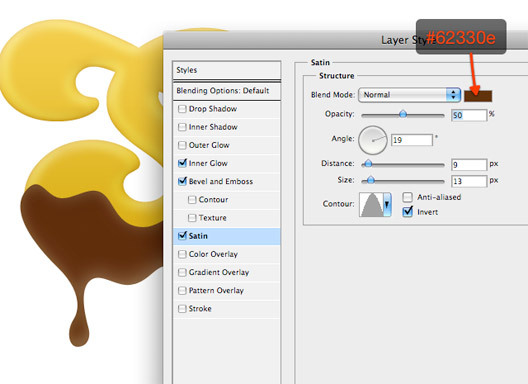
We can now make visible chocolate group and select the first shape, in my case the chocolate that covers the letter "S". Right-click and select blending options to play again with layer styles. We will add bevel and emboss, satin and inner glow to create the chocolate-styled effect.
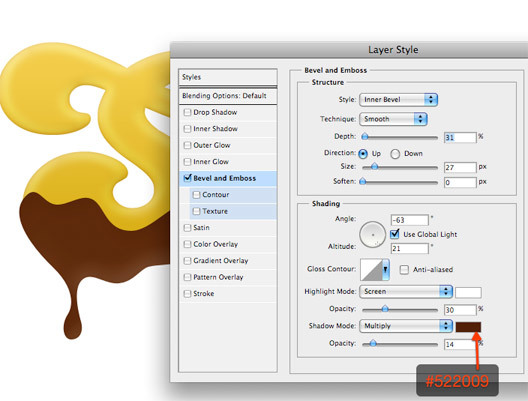
Step 10
Copy this layer style (right-click>Copy Layer Style) and paste it on all the other chocolate layers. Just one thing to modify: about the bottom chocolate mark, increase the bevel and emboss size. We've done! You can add a nice radial gradient to the background to finalize the work.
DOWNLOAD SOURCE FILE
More from Tutorials

How to Easily Remove Smoke From The Background in Photoshop
Tutorialsby Diego Sanchez
Smoke images can be used in a wide range of applications across various designs, such as adding drama to a photograph, crafting captivating visual effects on posters, or even giving your artwork a mysterious halo. Whichever the case, transparent smoke can serve as a powerful tool in your arsenal. So today, I will show you how easy it is to remove the background from a smoke image, and in the process, prepare the file to change the smoke color at any time you want, allowing you to seamlessly integrate it into your projects.
Read more
Easily Make a Glass Texture Effect in Photoshop
Tutorialsby Diego Sanchez
The glass effect has been used by many designers and photographers to add depth and dimension to their compositions with a touch of modern elegance. There are, of course, many different ways to apply a glass effect in Photoshop, but today I will show you how easy it is to make your own glass texture and apply realistic distortion to any of your images using nothing but the default Photoshop tools.
Read more
How to Easily Make Your Vector Digital Signature
Tutorialsby Diego Sanchez
In today's digital life, whether you are a freelancer, a business owner, or simply someone who frequently engages in digital transactions, having a well-crafted digital signature is almost indispensable to add a touch of authenticity and credibility to your documents. So today, I will show you how easily you can make your own vector digital signature in Illustrator for you to sign your digital documents or incorporate it into any design work.
Read more
Easily Make an Editable Grunge Text Effect in Photoshop
Tutorialsby Diego Sanchez
There are different ways to make a grunge text effect in Photoshop while keeping your text fully editable, and the most known one is to use a texture as a layer mask to hide part of the text. But Today I will show you a differnt approach on how you can make this kind of effect, while keeping you text fully editable and at the same time give you a bit more control over that effect by using a texture in a new layer (instead of a layer mask) that you can later move, scale, replace or combine with other textures without replacing any kind of layer mask.
Read more