Photoshop Quick Tip: Enhancing Your Portraits with Textures
I'm using textures from these two sets here at WeGraphics, but any good high resolution grunge texture will work. Grunge Textures Vol1 Bleached Paper Textures Here is a look at the original photo by Nosha. You can find it here.
 One thing to note is that the original image has a lot of cooler tones, and the textures that we're applying have very warm orange/yellow tones, so we'll be adding a lot of warmth to the image.
Grab one of the bleached paper textures and drag it to a new layer above the portrait. Set the textures blending mode to Soft Light.
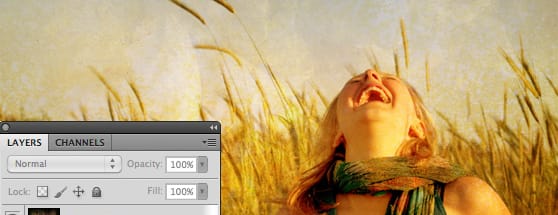
One thing to note is that the original image has a lot of cooler tones, and the textures that we're applying have very warm orange/yellow tones, so we'll be adding a lot of warmth to the image.
Grab one of the bleached paper textures and drag it to a new layer above the portrait. Set the textures blending mode to Soft Light.
 You'll immediately notice that there will be somethings you don't want. Distracting elements or too much texture over skin tones.
 To remedy this, you can select a color from the original texture. Doesn't matter too much which one, just a light color from the general area of the subjects face
 Then with a soft brush color that area of the texture to essentially erase the texture and replace it with solid color.
 Next I'm going to add another texture from the Grunge set to further enhance the contrast a bit.
 From here you could further enhance the photo with vignette or film edge burn.
More from Tutorials

How to Easily Remove Smoke From The Background in Photoshop
Tutorialsby Diego Sanchez
Smoke images can be used in a wide range of applications across various designs, such as adding drama to a photograph, crafting captivating visual effects on posters, or even giving your artwork a mysterious halo. Whichever the case, transparent smoke can serve as a powerful tool in your arsenal. So today, I will show you how easy it is to remove the background from a smoke image, and in the process, prepare the file to change the smoke color at any time you want, allowing you to seamlessly integrate it into your projects.
Read more
Easily Make a Glass Texture Effect in Photoshop
Tutorialsby Diego Sanchez
The glass effect has been used by many designers and photographers to add depth and dimension to their compositions with a touch of modern elegance. There are, of course, many different ways to apply a glass effect in Photoshop, but today I will show you how easy it is to make your own glass texture and apply realistic distortion to any of your images using nothing but the default Photoshop tools.
Read more
How to Easily Make Your Vector Digital Signature
Tutorialsby Diego Sanchez
In today's digital life, whether you are a freelancer, a business owner, or simply someone who frequently engages in digital transactions, having a well-crafted digital signature is almost indispensable to add a touch of authenticity and credibility to your documents. So today, I will show you how easily you can make your own vector digital signature in Illustrator for you to sign your digital documents or incorporate it into any design work.
Read more
Easily Make an Editable Grunge Text Effect in Photoshop
Tutorialsby Diego Sanchez
There are different ways to make a grunge text effect in Photoshop while keeping your text fully editable, and the most known one is to use a texture as a layer mask to hide part of the text. But Today I will show you a differnt approach on how you can make this kind of effect, while keeping you text fully editable and at the same time give you a bit more control over that effect by using a texture in a new layer (instead of a layer mask) that you can later move, scale, replace or combine with other textures without replacing any kind of layer mask.
Read more